How to Organize and Decorate a Small Kitchen: Simple DIY Tips
Struggling with a cluttered or cramped kitchen? You’re not alone. Small kitchens can quickly feel chaotic, making meal prep and daily routines…


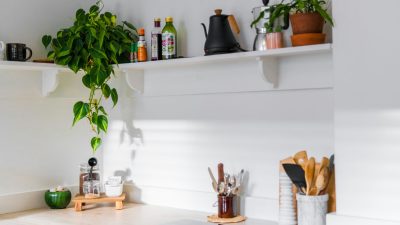
Hanging wall shelves might seem like a simple DIY task—until you step back and realize they’re uneven. Crooked shelves are one of the most common home improvement mistakes, especially for beginners. The good news? You don’t need professional tools or experience to get it right.
In this guide, I’ll show you exactly how to hang wall shelves perfectly straight, step by step. Whether you’re installing floating shelves in your living room or adding storage to a small space, this tutorial will help you avoid mistakes and get professional-looking results.
Before you start, gather these basic tools:
Spirit level (or a level app on your phone)
Measuring tape
Pencil
Drill
Wall anchors (if not drilling into studs)
Screws
Screwdriver
💡 Tip: If you don’t have a level, a smartphone app works surprisingly well for this project.
Stand back and visualize where the shelf should go. A common mistake is placing shelves too high or too low. For living rooms, eye-level or slightly above furniture works best.
Lightly mark the height with a pencil.
If possible, drill directly into wall studs for maximum stability. If not, use quality wall anchors suitable for drywall.
⚠️ Never rely on screws alone in drywall—it won’t hold long-term weight.
Use your measuring tape to ensure equal distance from the floor or ceiling. Mark drill points clearly.
This step is where most mistakes happen—measure twice, drill once.

Place the level across your marks and adjust until the bubble is centered. This ensures your shelf will be perfectly straight.
➡️ Do NOT trust the wall or ceiling—always trust the level.
Drill pilot holes, insert anchors if needed, and secure the brackets. Check with the level again before tightening fully.
Once brackets are secure, place the shelf on top and tighten everything in place.
Use the level one last time. Gently apply pressure to ensure stability before adding decor or weight.

Skipping the level
Not measuring shelf spacing evenly
Using the wrong wall anchors
Rushing the drilling step
Overloading shelves immediately
Avoiding these mistakes alone puts you ahead of 80% of DIY beginners.
This video visually demonstrates the same steps explained above and is perfect for beginners:
Wall shelves are ideal for:
Living rooms
Small apartments
Home offices
Bedrooms
Entryways
They add both functionality and visual balance.
👉 Related read:
DIY Wall Decor Ideas
DIY Home Decor Ideas
If your wall is concrete, brick, or unusually fragile—and you’re unsure about drilling—calling a professional might save time and damage. There’s no shame in protecting your home.
Hanging wall shelves straight isn’t about strength or experience—it’s about precision and patience. With the right tools and a clear step-by-step approach, anyone can achieve clean, professional results.
Take your time, trust the level, and enjoy the satisfaction of a DIY project done right.